

VIRTUAL PINBALL MACHINE
I HATE PINBALL
I have to start by saying - I've always hated Pinball. I've never been good at it, never understood how people enjoyed it, and found it to be literally the only thing left in the 21st century that coin currency is any good for. But then, thanks to my Reddit addiction and their stupid algorithms, a post was suggested that showed what looked like a real pinball machine - only it was virtual. It wasn't mechanical at all in fact - it had 2 display screens that would dynamically change based on what game you were playing, cost $0 to play, lit up like Las Vegas, and looked to have practically unlimited games.
Ok now you have my attention.
DISCOVERING VIRTUAL PINBALL
The community I stumbled across was /r/virtualpinball. Of course there was a lively community on Reddit, dedicated to this unique hobby - if you want to learn anything at all, you can find it on Reddit. I spent 2 hours that night browsing through peoples' posts and projects, reading through questions they had about the software, how to set it up, what hardware was needed, where to find games, and eventually decided that there was no way on earth I wouldn't have one of these things.
In the process, I bookmarked several other connected resources outside of Reddit to come back to later - and as a way of helping the next guy, here are links to some of the most useful resources out there:
For Games, Artwork & Community: VPUniverse
This is my number one go-to place and I check it nearly every day to see what updates or new creations are out there, namely, the 'Virtual Pinball Spreadsheet' web-app.
For more Games, Artwork & Community: VPForums
This is another great resource - many of the VPUniverse spreadsheet files link to this site directly, and the community is fantastic.
Required Software: Nail Buster's 'Baller Installer'
This software makes it almost foolproof to get your rig set up in the first place - just make sure to watch the short tutorial video first, conveniently linked on that page.
Required Software: JoyToKey
I'm not even sure this is actually required, but it made things easier for me. I think. It allows you to assign arcade buttons to keyboard keys, which you can cross reference in the controls settings of the Visual Pinball X software.
Unique Pinball Machine Hardware: PinballLife
I wanted actual pinball machine legs for my cabinet, and found them here - huge selection, and a lot of other neat hardware to be found as well.
And of course: Reddit | Amazon
For when you want to ask for help, show off your work, or buy random parts/pieces necessary for your cabinet - namely buttons, lights, switches, things like that.
HARDWARE AND SOFTWARE FIRST


Before getting in too deep, I wanted to see if one of my old gaming PC's was capable enough to run the pinball software from Nailbuster, so I dug that thing out, fired it up, connected all the screens and installed the software. This machine was a super old Dell Optiplex from 2013 that had a 2nd generation Intel Core i7, Geforce 750Ti, 4GB of memory and a 500GB spindle. The Baller Installer software came with Leprechaun King pre-installed, so I fired it up and to my surprise, it actually ran pretty well considering the old hardware - so off I went playing with controls, screen layouts, and graphics settings to fine tune it. Now I was sold.
One of the cool things about building your own Pinball cab is that you can basically do whatever you want. One screen? Two screens? Three or four? This also means you can customize your cabinet for whatever hardware you have lying around the house, or whatever is cheapest on Amazon. In my case, I opted to do 3 screens - one for the playfield, one for the backglass, and one for the DMD.
For reference, since it took me a second to understand these things:
Playfield - the actual play area for the pinball table.
Backglass - The artwork that displays on the top of a traditional pinball cabinet.
DMD - Dot Matrix Display - the little LED screens that show score tally's.
I bought a 42" TLC TV from Walmart for like $150, and had a couple identical LCD monitors lying around to use for the backglass and DMD and built my cabinet around their measurements. There are options out there to buy pre-fabricated lumber and simply assemble the cabinet, but I wanted to do it myself from the ground up.
I used AutoDesk's Fusion 360 software to design and virtually assemble the cabinet I wanted, and because of that I was also able to get all of the exact measurements I needed to make this project come to life. Once I was happy with the result, off to Lowe's to buy lumber and hardware!
DESIGN AND BUILD


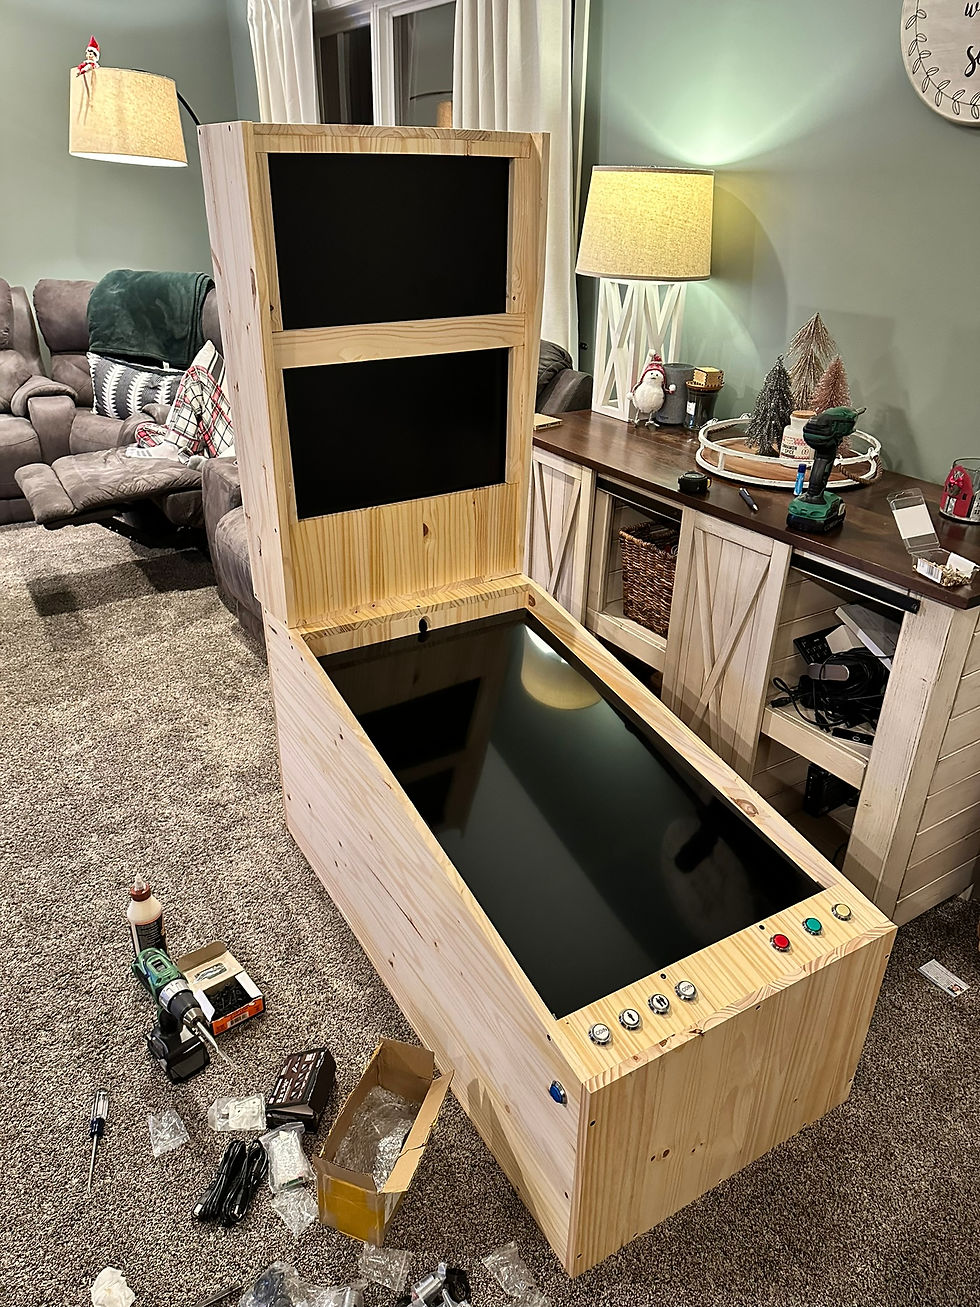
I cut all the lumber with nothing more than a table saw and a miter saw. I pre-drilled all my pilot holes, applied wood glue at the seams, and Lego'd that shit together in my kitchen like a boss, and once the main frame assembly was done I drilled out holes for the various buttons and electronics.
After getting all the pieces together, I realized that there was no way I could move this thing from room to room, because it was way taller than I'd anticipated, especially once I put legs on it. So I called a last second audible and installed a hinge where the top section met the bottom, allowing it to fold perfectly flat (while staying expertly aligned) so I could move it about.
It was finally starting to take shape.
PAINT AND PRETTY
After letting the cabinet sit overnight so the glue would cure, I picked up on it again first thing in the morning. Everything got sanded down to remove any imperfections in the wood, and then a small paint booth was built in the garage (similar to the Datsun paint booth, only smaller) and I primed it before spraying the entire cabinet black with an electric paint sprayer. In the meantime, while the cabinet sat to dry I worked at getting all the electronics setup and ready to be put into the cabinet.
Since all of the components needed to reside inside the cabinet where they couldn't be accessed easily, I had to rig up a way to turn the computer on and off, find a place to put the speakers and subwoofer, and apply power to the cabinet so it wouldn't look like a janky mess. Lucky for me I take joy in this part, again thanks to Reddit's /r/cableporn. Using a mix of solder, heat-shrink tube, breadboard wires and cable ties, things came together quite nicely - a small, almost secret power button was installed near the rear of the cabinet which would power the computer on and off, and all the cable runs went perfectly, leaving exactly enough slack to open and close the hinge without any issues. All of the buttons that were to be used for the pinball machine itself all clipped easily into a single USB board, that had only 1 single USB cable coming off of it into the computer. By now, the paint was dry enough to assemble everything.
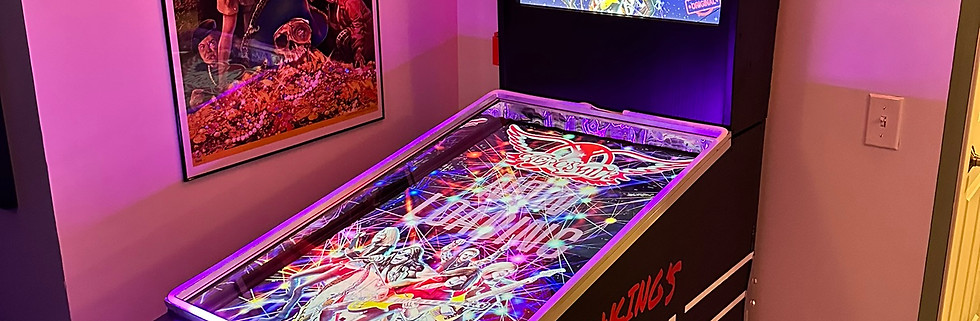
By the end of the next day the entire thing was assembled, cabled up, and fully functional. To take things a step further, I added some vinly graphics, LED lights, acrylic screen protector, a 3D printed cup holder, and eventually a StreamDeck to help automate some of the functions of launching the game and controlling volume. Needless to say, the kids absolutely love it and it's a super cool conversation piece for when friends or family come over. Over the next several months, I'd spend time adding new games to the setup, ultimately upgrading the gaming PC to something much newer, and even designing my own pinball table using the software from Nailbuster.
I no longer hate pinball.


